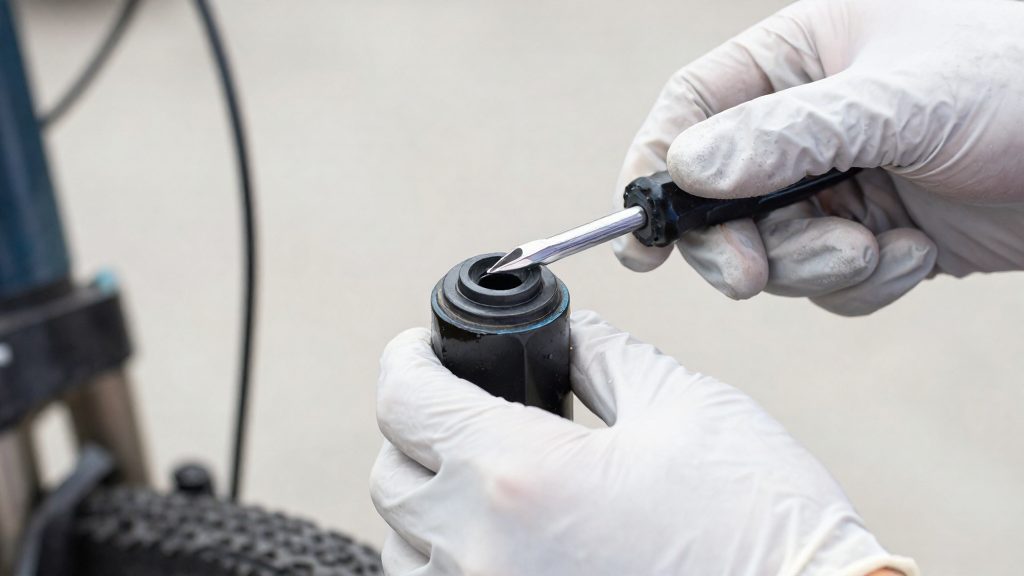
Fork seals keep the moving parts of a front fork separated from the outside world. Wiper seals stop grit and water from entering the lower leg, while foam rings and oil seals keep the lubricating and damping oil inside. When a seal fails, the fork loses its oil and its protection, and the debris that gets in starts to wear the surfaces the seals were protecting.
Why do fork seals need servicing?
Each seal has one job, and a failure in any of them affects a different part of the fork.
| Seal | Job | Effect when it fails |
|---|---|---|
| Wiper seal | Wipes the stanchion on every stroke and blocks grit | Grit enters the lower leg |
| Foam ring | Holds lubricating oil against the bushings | Bushings lose their oil supply |
| Oil seal | Retains damping oil in the lower leg | Damping oil escapes |
Wiper seals block grit
The wiper seal sits at the top of the lower leg, where the stanchion slides in and out. Each compression cycle wipes road grit, sand and mud off the stanchion before it can travel further. Once the wiper seal is torn or hardened, debris rides down into the lower leg on every stroke.
Oil retention and damping
Foam rings are soaked in bath oil before fitting so that they hold lubricant against the stanchion. Oil seals keep the damping oil in the lower leg. If oil escapes, the bushings run with less lubrication and the damping changes, so the fork responds differently over the stroke.
Abrasive wear from contamination
Grit that passes a failed wiper seal acts as an abrasive between the stanchion and the bushings. Repeated strokes score the stanchion surface and wear the bushings. Keeping grit out with a sound wiper seal helps slow this wear.

Signs your fork needs a lower-leg service
Four observable symptoms show that the lower-leg seals need attention: oil residue or leaks on the lower legs, discoloured stanchions at the seal contact area, a sticky feel, and a fork that does not return to full travel. Each of these is listed as a sign that a minor service is needed. Checking for them takes a few minutes with a clean cloth and the fork at rest, and it does not require removing anything. These signs mean a minor service is already needed. Road.cc (2021) also notes that no visible sign tells you in advance when a service is due, so a clean fork does not mean the seals are fine. Keep to the service interval as well.
Oil residue on the lower legs is the most direct sign. Look at the area just below the lower-leg wiper seal, where the lower leg meets the stanchion. A film of oil, or drops that have run down the lower leg, indicates that oil is escaping past the seal. Wipe both legs clean, ride a short distance, then check again. Fresh oil in the same place confirms a leak. Check both legs, because a leak often appears on one side first.
Discoloured stanchions show up on the chrome or anodised surface of the stanchion, in the band the seal rides over. Inspect the stanchion with the fork clean and dry, and compare the left and right tubes under the same light. A change in colour or finish at the seal contact point is a sign that a minor service is due.
A sticky feel is a change in how the fork moves. Compress the fork slowly by hand, then release it. A fork that stops partway through its stroke, or that moves in jerks instead of smoothly, shows that the seals or the internal lubricant are no longer working as intended.
A fork that does not return to full travel is the last sign. After compressing the fork, let it extend on its own. If it stops short of its original height, or one leg extends more slowly than the other, the seals need servicing.
How often should you service fork seals?
Lower-leg (fork seal) service is generally suggested about every six months, according to road.cc (2021). That figure is a calendar guideline, not a measure of use. A fork ridden hard in summer and one that sits in a garage for half the year can have very different wear, so treat six months as a starting point and check the interval against how much you ride.
The interval also varies by manufacturer, and the figures are not interchangeable. Road.cc (2021) cites two examples:
| Manufacturer | Service type | Interval |
|---|---|---|
| RockShox | Lower-leg service | Every 50 hours of riding |
| Fox | Full service | Every 125 hours of riding |
These numbers are not directly comparable. A lower-leg service covers the seals and foam rings at the bottom of the legs, while a full service opens the fork more completely and covers more internal components. Fox’s 125-hour figure refers to a different job than RockShox’s 50-hour figure, so a shorter interval is not automatically a stricter or more correct one. Check the service manual for your specific fork model and follow its interval for that job.
Adjusting the timing for wet and dusty riding
Manufacturer intervals assume typical conditions. Wet and dusty riding carries grit and water into the seals faster, so the practical interval should shorten. Two approaches help:
- Log hours, not just months. Track riding time with a head unit or a simple ride log, and service at whichever comes first: the six-month mark or the manufacturer’s hour figure.
- Shorten the interval after muddy or gritty rides. If you ride in mud, sand or regular rain, bring the service forward and treat it as a condition-based job rather than a calendar one.
Tools and parts you need
Gather the full lower-leg kit before you remove anything, so the job isn’t interrupted partway through. According to road.cc (2021), a lower-leg service kit contains new wiper seals, foam rings and crush washers.
| Component | Role in the service | What to check |
|---|---|---|
| Wiper seals | Keep dirt out of the lower leg as the stanchion moves | Confirm the part numbers match your fork model |
| Foam rings | Wipe the stanchion and retain oil in the lower leg | Check against the kit contents list |
| Crush washers | Seal the lower-leg fasteners | Confirm your fork uses them (see below) |
Crush washers vary by fork brand. Manitou forks have no crush washers, so their kits will not include them. Do not search for a washer that the fork does not use. Compare the kit contents against your fork’s own service documentation before you start.
Fork-specific tools and general workshop items:
- Plastic mallet and installer tool: the SR Suntour Axon34 procedure presses the dust seals in by hand, then taps them flush with these.
- Torque wrench: use one for the lower nuts or bolts rather than an impact tool.
- Clean rags and a suitable container: for wiping components and catching drained oil.
How do you remove and replace the seals?
Removing the fork seals starts with releasing the air spring pressure and recording your settings, then extracting the wiper seals and foam rings in a controlled order that keeps the stanchions undamaged. Work slowly at the seal area to avoid scratching the stanchions.
Release the air spring and record settings
Release the air spring pressure before you open the leg. The Australian Mountain Bike (AMB) magazine procedure warns that oil can spray when air is released, so wear eye protection and gloves. Figures in this guide are metric (ml, Nm); a torque wrench with N·m markings or a conversion chart is needed if yours is in lb-ft. Note your current air pressure and any damping or rebound settings first, so you can restore them after reassembly.
Work in a fixed sequence
Follow the order in your manufacturer’s manual. The general sequence is:
| Step | Action | Purpose |
|---|---|---|
| 1 | Release air pressure and note settings | Makes the fork safe to open |
| 2 | Remove the components that block access to the lower leg, as the manual directs | Gives clear access to the seal |
| 3 | Extract the wiper seal, then the foam ring | Clears the seal area for the new parts |
| 4 | Inspect the stanchion surface and the seal housing | Confirms the parts are ready for the new seals |
Keep the parts from each leg separate so they go back to the same side.
Prying out the wiper seals
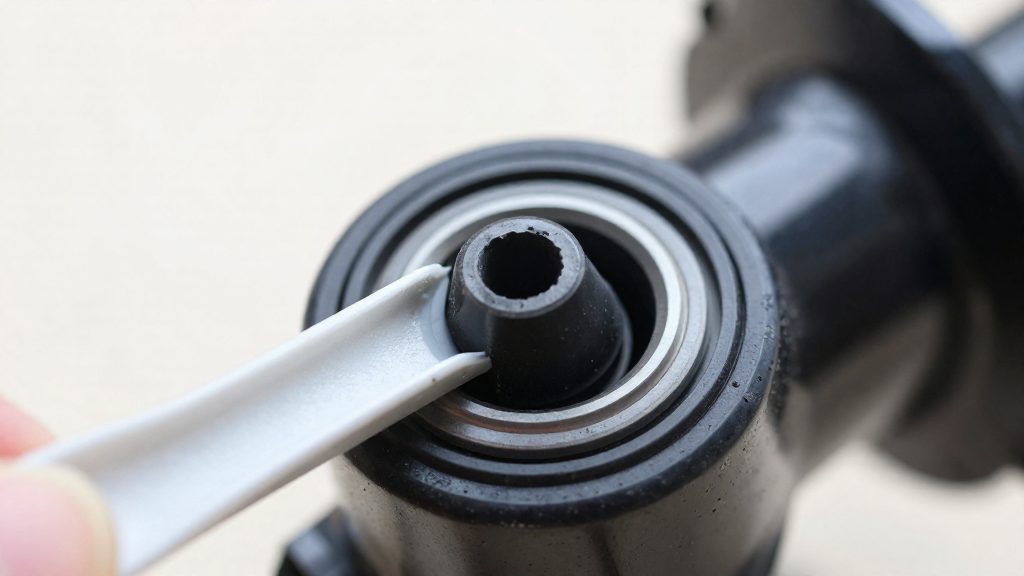
Wrap the tip of a flathead screwdriver in tape. Road.cc (2021) recommends this so the metal does not scratch the interior. Position the tip under the outer edge of the wiper seal and lever gently in small steps, moving around the seal rather than applying force at one point. Lift the seal out evenly.
Discarding the foam rings
Do not clean the old foam rings. Road.cc (2021) advises replacing them, and the new rings from the kit are installed in the reassembly stage. Put the old rings aside with the removed wiper seals and dispose of them with your other worn parts.
Oil, grease and torque specs
Fork oil weight, oil volume and lower-bolt torque vary by fork model, so the figures below are worked examples, not universal settings. The Australian Mountain Bike (AMB) magazine procedure uses 30wt oil, with about 7 ml injected into each leg and the lower bolts torqued to 8 Nm. SR SUNTOUR’s Axon34 procedure also calls for 8 Nm, applied to both lower nuts. Treat these numbers as a cross-check against the service data for your own fork.
Fork oil weight and volume per leg
The oil weight (viscosity grade) and the quantity you inject both change how the fork damps and feels through its stroke. In the AMB example, the reference is 30wt oil at about 7 ml per leg. Measure each leg separately with a graduated syringe or measuring cup, and keep the two volumes identical so the legs behave the same. If your manufacturer specifies a different weight or volume, use that figure instead.
Lower bolt torque
The lower nuts or bolts clamp the lower legs in place. The AMB example tightens them to 8 Nm, and the SR SUNTOUR Axon34 procedure tightens both lower nuts to the same value. Use a calibrated torque wrench and set it to your manufacturer’s specification, not to a value copied from another fork.
Grease for seal lips and bushings
Grease the inside of the seals and the bushings. The SR SUNTOUR Axon34 procedure is explicit that the shaft O-rings should stay ungreased. Choose a grease that your fork manufacturer’s service manual names, because grease type is model-specific and this guide does not recommend a particular product.
Manufacturer checks before you start
- Confirm oil weight and volume per leg against your fork’s service manual.
- Confirm the lower-bolt torque for your exact model.
- Confirm which parts take grease and which must stay dry.
Reassembly and final checks
Reassembly reverses the teardown order, but three steps determine whether the new seals perform: pre-soaking the foam rings, seating the wiper seals square, and verifying the fork after the lower legs are back on. In SR Suntour’s Axon34 procedure, the foam rings are soaked in 20wt oil for 5–10 minutes before fitting.
Pre-soak the foam rings
Foam rings hold a film of oil against the stanchions, so they should go in saturated, not dry. Soak the new rings in bath oil before installation. The SR Suntour Axon34 procedure uses 20wt oil for 5–10 minutes. Check your own fork’s manual for the oil and time it specifies.
Seat the wiper seals without scratching
Take care when seating the wiper seals, because careless installation can scratch the stanchion. Work methodically:
- Confirm the seal’s orientation against the manufacturer’s exploded diagram before pressing it in.
- Start the seal by hand so it sits square to the stanchion.
- Drive it home with an installer tool and a plastic mallet, tapping evenly until it is flush.
- Never use a flathead screwdriver to push new seals into place.
Verify function after assembly
Before riding, cycle the fork by hand and check it against the following points.
| Check | What to look for | If it fails |
|---|---|---|
| Stroke | Smooth compression and extension through full travel | Recheck seal seating and bushing alignment |
| Return | Fork extends back to full travel without hesitation or sticking | Inspect for debris or binding at the bushings |
| Leak-free operation | Dry stanchions and seal areas after several cycles | Disassemble again and inspect the seal seat |
When to take it to a shop
Home seal service works only while the damage stays in the consumable parts: wiper seals, foam rings and oil. Once the stanchions, bushings or damper are involved, the job changes, and a seal kit no longer fixes the problem.
Worn anodising near the start of the stroke
Anodising is the hard surface treatment on the stanchion, and it protects the metal that the seals run against. According to road.cc (2021), if the anodising has worn off near the start of the stroke, the fork needs new stanchions and a fuller service. A new seal running on a worn surface wears quickly, so replacing only the seals does not solve the problem. Have a workshop assess the stanchions before you spend money on a kit.
Internal bushing and damper damage
Bushings and damper components sit inside the fork, beyond what a seal kit replaces. If the fork still feels loose or inconsistent after new seals are fitted, the cause is likely inside the leg. Check whether the manufacturer’s service manual treats these parts as user-serviceable. If it does not, take the fork to a qualified workshop or the manufacturer’s service network.
Warranty and manufacturer tooling
Opening a fork can affect warranty cover, so read the warranty terms before you start. Some manufacturers specify particular tools, oil quantities or torque values. Substituting a generic tool for a specified one risks damage that the manufacturer will not cover. Contact the manufacturer or an authorised dealer if the manual calls for a tool you do not have.
| Condition | Action |
|---|---|
| Anodising worn near the stroke start | Shop assessment; new stanchions and a fuller service |
| Looseness or inconsistent damping after new seals | Check the service manual; shop or manufacturer service if not user-serviceable |
| Warranty still active or a specialised tool required | Contact the manufacturer or authorised dealer first |
Frequently asked questions
How do I know when my front fork seals need servicing?
According to road.cc (2021), a lower-leg service is suggested about every six months, and no visible sign tells you when one is due. Oil leaks, discoloured stanchions, a sticky feel, or a fork that does not return to full travel mean a minor service is already needed. A clean fork does not mean the seals are sound, so the time interval still applies.
What torque should the lower nuts or bolts take?
The Australian Mountain Bike (AMB) magazine example and the SR Suntour Axon34 procedure both use 8 Nm on the lower fasteners. That equals about 5.9 lb-ft, or roughly 71 in-lb. Your fork manufacturer’s specification takes priority over these examples.
What should I do before opening the lower legs?
Release the air spring pressure first, and note your current rebound and air settings so you can restore them afterwards. AMB warns that oil can spray when air is released, so wear eye protection and gloves. If the anodising has worn off near the start of the stroke, road.cc (2021) advises that the fork needs new stanchions and a fuller service.